Showing posts with label Tsukineko inks. Show all posts

Thursday, September 27, 2012

Getty Inky Challenge

We're into the home stretch with the September Getting Inky with Stencils challenge, but there's still time to submit your project for a chance to win the stencil of your choice.  How good is that?

Fall is definitely in the air and pumpkins are turning up everywhere, include today's project.


Begin by paste embossing the Long Pumpkins (LL514) stencil with regular embossing paste (DEP, the jar with the maroon label).  When the paste is dry, reposition the clean stencil over the image and color with pigment inks (I used Tsukineko's Splendor inks for this project).  Then, cut out the pumpkins in such a way that you end up with two pieces that you can pile one on top of the other.  Add patterned paper and the embellishment and/or sentiment of your choice and you're done!  

For more ideas and inspiration, see what the rest of the team has done and then get busy and submit your project before the end of the month deadline, using Mr. Linky on the Dream it Up! blog.  Ready?  Here you go:

 
Happy Crafting,
Liz


Thursday, September 13, 2012


Continuing with the "Getting Inky" challenge, I went back to one of the most basic techniques –  stenciling with pigment inks – which is great for showing off a stencil's beautiful details.  

And I decided to go out of my comfort zone and use non-traditional Christmas colors.  It's really fun!  

Here's what to do:
Begin by dry embossing the Line of Christmas Trees (LL532) using either a personal die cut machine or a light box and stylus.  If you use a die cut machine, remember to use new cutting plates and keep the stencil as far away as possible from the top roller.  This will keep the stencil from warping.

With the stencil still in place, color the image using a stencil brush and ink, remembering to rub off some of the ink from the stencil brush on to a paper towel before applying it to paper to keep the excess ink from seeping under the stencil.   This is one of those times where the Picasso tool comes in handy, allowing you to apply color exactly where you want it.

Trim to desired size, adhere to mat(s), then to patterned paper.  Add ribbon or other embellishment and adhere to card base.  There you have it!  This is a great card for making multiples.

Be sure to check out the other Design Team blogs for more ideas and inspiration and leave us a note to let us know you stopped by.  Then link your project to the Dream it Up! blog using Mr. Linky.  There's a twist to this month's challenge:  the two winners (one for best interpretation of the challenge and one for best usage of Dreamweaver Stencil products) will get to pick a stencil of their choice!  


See you next week.
 
Happy crafting,
Liz


Thursday, April 26, 2012

April Showers Bring May Flowers . . .

 . . . I hope that's true, since the San Francisco Bay Area received half of this year's total rainfall in the last six weeks!   It's been a very wet spring, but the flowers (and pollens) are loving it.  For the last post of the April challenge I've made an April showers and flowers card.

I positioned the Long Sunflower stencil (LL429) so that only the top part of the flower was on the paper.  And by flipping the stencil over, I was able to change the orientation of the flowers.  I also found it was easier to stencil the flowers on each side of the card, let them dry briefly, and then stencil the middle flower.   If you're making several cards, do all the same colored flowers at once so you'll only need to wash your stencil when you reposition it to color the next flower.  Choose bright colors for the flowers as pastels will fade away under the "rain."

For the rain drops, I used the Rain stencil (LJ905), and embossed it with Translucent Embossing Paste mixed with a touch of Metallic F/X, Navajo Sky.   

 I have a friend who is not feeling well and this might be a "sorry to hear you're under the weather" card for her.  Some of the others might become note cards with a "thinking of you" stamped inside.  I love choices!

 Don't forget to visit the other Design Team blogs for more ideas and inspiration, and be sure to link your project using Mr. Linky on the Dreamweaver Stencils' blog, Dream it Up!

Happy Crafting,
Liz

Thursday, January 12, 2012

Hearts and Flowers

What better way to say Happy Valentine's Day than with hearts and flowers . . . and CANDY?  And here's the perfect card to go with those yummy chocolates.
Begin by paste embossing the Floral Heart stencil (LG712) white embossing paste (DEP).  When the paste is dry, position the clean stencil over the image and color to your heart's content.  I used a variety of inks (mostly Splendor Inks by Tsukineko), Metallic F/X and Metallic Gelly Roll pens by Sakura, to achieve the desired results.  Give the ink ample time to dry before cutting out the image.  Prepare your card base and mat, add ribbon and image and you're done!

And don't forget . . . there's still time to play along with the January challenge.  For the month of January, we challenge you to create something for Valentine's Day.  You have until January 31st, 11:59 PM EST, to post and link your creation(s) to the Dream It Up! blog Mr. Linky.  The winners will be announced February 2nd, along with the February challenge.

Need more inspiration?  Please visit the rest of our fabulous team:


See you next week,
Liz

Thursday, November 24, 2011

Happy Thanksgiving

If you're taking a break from family, dinner dishes and football, you couldn't have come to a better place.  The Dreamweaver team is sending Thanksgiving wishes to you, our faithful readers.   Sit back and take a look at what we've been working on.


Begin by paste embossing the Cornucopia stencil (LL529) with regular embossing paste (DEP).  When the paste has dried, reposition the clean stencil over the card and color to your heart's content.   Add your sentiment, embellishment and layer on your choice of patterned paper.  Adhere to card stock and you're done! 

This is a very short post, but I do want to remind you to be sure to visit the Dream Team blogs for more ideas and inspiration, and don't forget – there's still time to submit an application for the Dreamweaver Stencils Design Team Call.  You can get the details here.

Thank you, thank you, thank you for being such faithful followers.  We love hearing from you (and the attention), so don't be shy . . . leave us a note and let us know you've stopped by. 

Happy thanksgiving to all,
Liz

Thursday, October 27, 2011

Dream Scheme Sketch Challenge

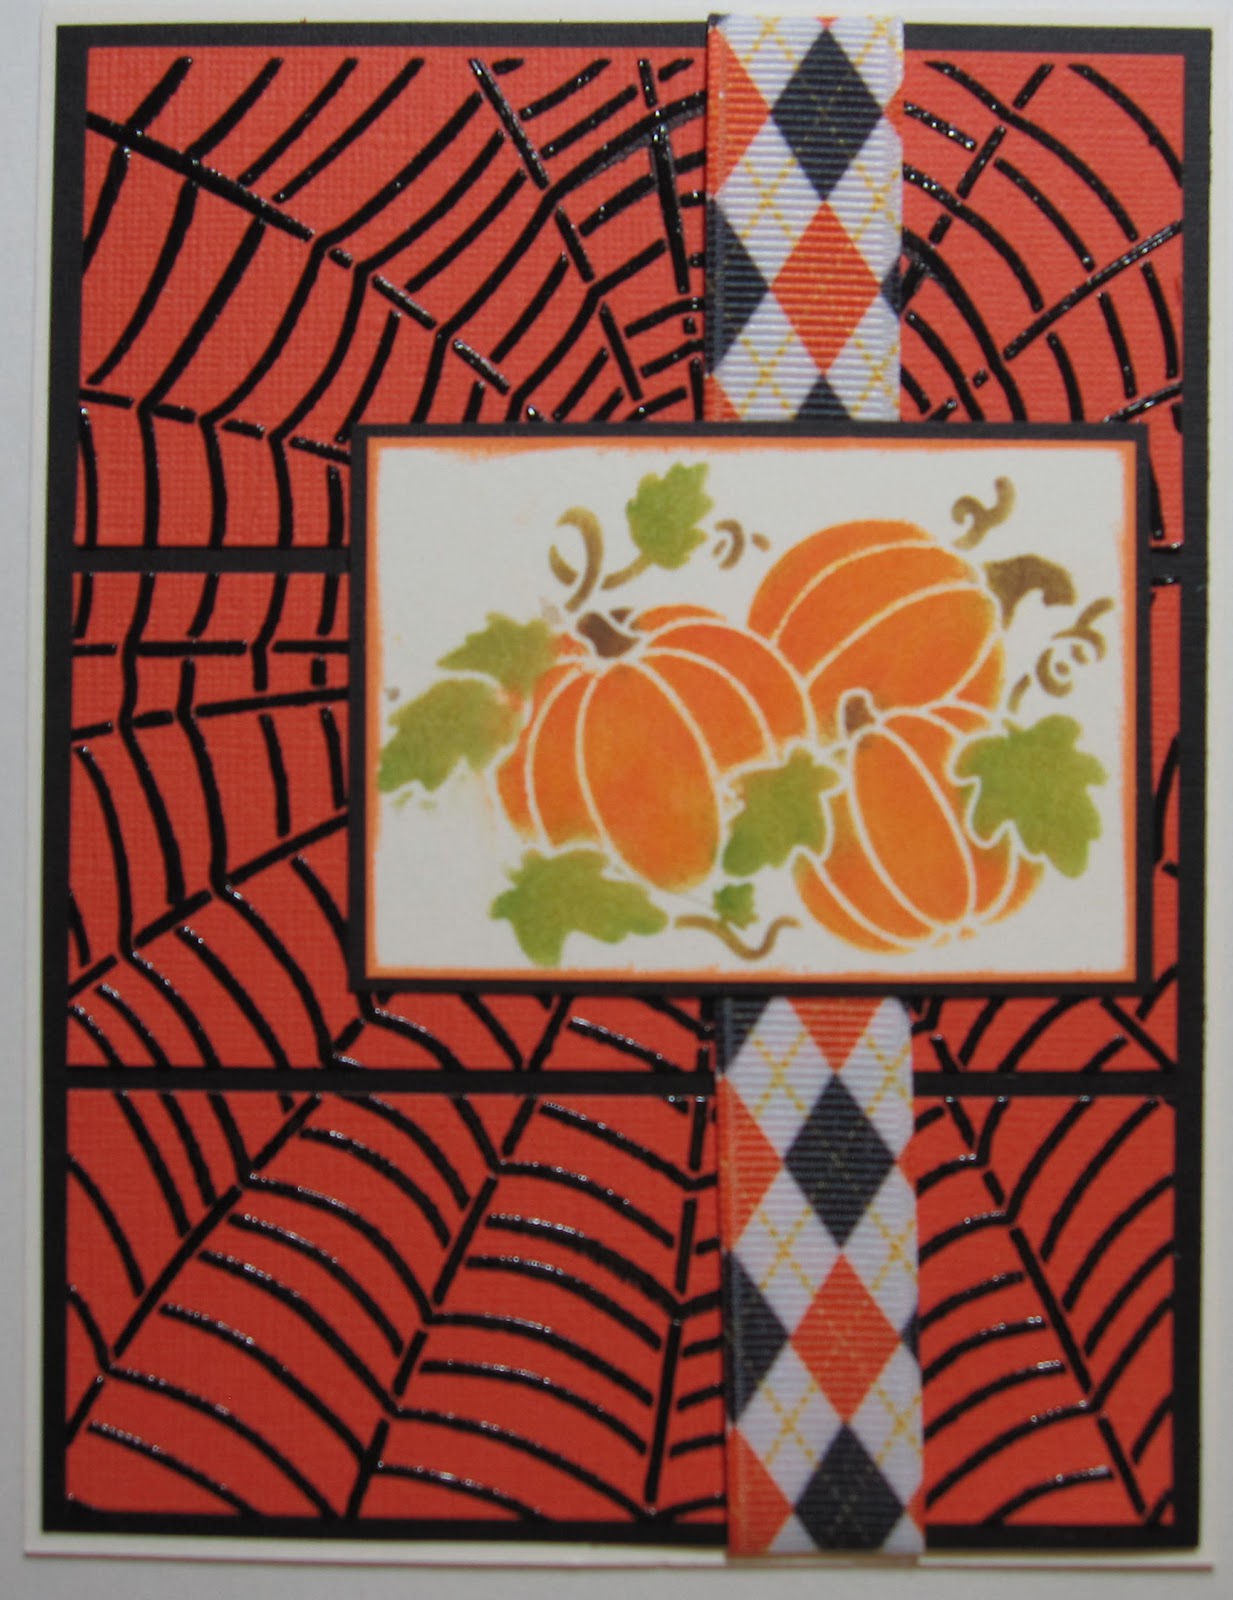
I'm not a big fan of Halloween, as some of my friends are.  You won't find my house decorated with fake cobwebs (I have real ones), black cats with arched backs (again, why go for paper cut outs when you can have the real thing) or orange twinkle lights.  I do, however, have some very realistic looking black rats that make an appearance about this time each year.  Pumpkins and Indian corn are the extent of my Halloween decorating and, once the rats are gone, it's a smooth transition to Thanksgiving.  If I'm lucky, the pumpkins will become pie; if not, they'll get spray painted gold and silver and with some glittery leaves and bows become front porch Christmas decorations.

Halloween cards are another matter.  I love making and sending them almost as much as Christmas cards.  And when there's a sketch challenge involved, it even gets better.   Today's sketch comes from Dream Teamer Kim and my card, with artistic license, follows.


The Spider Web (LJ816) stencil is perfect for this background as it is easily cut into sections without diminishing the design.  I paste embossed the stencil with Glossy Black Embossing Paste (DGKP) on to orange card stock.  For the pumpkins, I used the three pumpkins from right end of the Long Pumpkins (LL514) stencil.  After taping the stencil to cream colored card stock, I added color with Tsukineko's Splendor inks.  To balance the image, I repositioned the stencil so the leaves on the top left of the stencil were at the top of the left pumpkin so it looks like the leaves are growing right off the stem.    I cut the image to size, inked the edges with a coordinating color and mounted it on black card stock.  I added ribbon (artistic license), put it all together and there you have it.  Done just in time to get it in the mail!

There's lots more to see, so be sure to check our there rest of the Dream Team bloggers to see what treats they have in store for you.  And be sure to play along with us and post your project on the DREAM it UP! blog.  It's easy using Mr. Linky.  See you next week.

Happy Halloween,
Liz                                                                           

Thursday, October 6, 2011

Celebrating Canadian Thanksgiving on Dream Scheme Thursday

Warm wishes to all our Canadian friends who will be celebrating Thanksgiving on Monday.   And in honor of Canadian Thanksgiving, I've chosen this card for our Designer's Choice Dream Scheme Thursday.


To begin, paste emboss the long pumpkin stencil (LL514) with the white embossing paste (DEP).   When dry, reposition the clean stencil and apply color.  I gathered all the inks I had in shades of yellow, orange, green and brown and went to work (mostly Splendor inks by Tsukineko).  That was really a lot of fun.  I then tore the edges, added a sentiment and string embellishment, mounted it on patterned paper and then on card stock edged in orange with a Copic marker.

This card is a little bit country, but with a bit of Metallic F/X on the leaves and pumpkin tops and different patterned paper, it could have a very different look.  Which brings me to the tip of the day.  I know most of you already know this, but it took me a while to translate the tips and tricks I developed in my day job to my paper crafting life.  While you have your work station set up, paste a whole bunch of images at once (you'd be surprised how many places you can put them while they're drying!).  Then, when you have another chunk of time set aside, do your coloring and take some time to experiment.  Remember, there are no mistakes, only opportunities for making something different.  Then, you're on to assembling the parts, having cut, torn, or otherwise prepared the various papers and embellishments ahead of time.  And before you know it, you've got a card to send and one or more for the stash.

Products used (in addition to those listed above):
Card base:  Neenah Natural White
Patterned paper:  Autumn Spice, Stampin' Up
No brand named:  twine, sentiment


Happy crafting,
Liz