Thursday, February 14, 2013

Hearts, Hearts and More Hearts

Happy Valentine's Day to all my friends and readers!  This month's challenge, CAS Love and Friendship, is perfect for the newly released ruffled hearts and Molten Magic technique. 
Here's what you'll need:
LG747 Ruffled Hearts
LS1004, You & Me
DPP Pearlescent Paste
Metallic F/X colors of your choice
DCP Metallic Gold Paste
DPK Palette Knife
LM2010 Paste Spreader
Removable tape
Small paint brush or Q-tip

Here's what to do:
Tape top of stencil to craft mat.  Lift stencil and slip card stock underneath.  Apply paste with paste spreader.   Remove card stock and set aside.  Repeat for second heart.  Set stencil, palette knife and paste spreader in a pan of water.  Sprinkle Metallic F/X over hearts by dipping paint brush or Q-tip into mica powder and gentle tapping over pasted image.  You may have to do this several times to get the coverage you want.  Heat the paste with a heat tool until bubbly.  Set aside to cool.

Tape You & Me stencil to card stock and apply Metallic Gold paste.  Remove stencil and set pasted image aside to dry.   Wash and dry stencils, palette knife and paste spreader.

Cut out hearts and trim sentiment to desired size.  Assemble on patterned paper and coordinating mat and you're done!  Ready to give to that special someone.

There's still plenty of time to submit your project for this month's CAS (clean and simple) Love and Friendship challenge, so get busy!  Link your crafty goodness using Mr. Linky on the Dream it Up! blog or send a photo of your project to Lynell at lynell@dreamweaverstencils.com or, if after February 13, to Louise Healy at louisehealy@sbcglobal.net). If you need a few more ideas or a bit more inspiration, check out out the rest of the Dream Team blogs, starting with Dreamweaver's blog, DREAM it UP!  
Liz Martin (you're here)
 
But wait!  There's more!   If you're as passionate about Dreamweaver Stencils as we are, please consider joining the team.  There's a Design Team call going on this month, so check it out.   You can find out more about that here (clink on the link under the banner).  
 
See you next week,
Liz

Thursday, February 7, 2013

It's February and hearts are everywhere

The search is on for new members for the Dream Team, so get busy!  You can find out more about that here (clink on the link under the banner). 

This month's challenge theme is Clean and Simple Love and Friendship and there are so many stencils to choose from.  Not being able to make up my mind, I picked two for today's post!

Here's what you'll need to get started:
LM2000,  Heart Swans
LM241,  Happy Valentine's Day
DPP, Pearlescent Embossing Paste
FX05, Metallic F/X Goldfinch
DCP, Metallic Gold Embossing Paste
DPK, Palette Knife
LM2010, Paste Spreader
Heat Tool
Card stock and ribbon or other embellishment of your choice

The cream card stock measures 4" x 5-1/4" which fits the stencils perfectly.  Tape the top of the stencil to a craft mat or other surface.  Lift up the bottom of the stencil and center your card under it.  Cover the bottom part of the card with scrap paper to keep it clean.  Spread the Pearlescent Embossing Paste over the stencil with the palette knife.  Remove the card and place the stencil in a pan of water.  Sprinkle the paste with the Metallic F/X and heat with a heat tool until the paste begins to bubble.  This is the Molten Magic technique.

For the sentiment, tape the bottom of the Happy Valentine's Day stencil to the craft mat or other surface.  Raise the top and slide your card under the stencil.  Protect the top half with scrap paper.  Apply Metallic Gold Embossing Paste with the paste spreader.  Remove card and set aside to dry.  Wash and dry stencils, palette knife and spreader.

When the paste is dry, add your embellishment, mat on coordinating card stock and then to card base and you're done!

There's plenty of time to work on this month's challenge (link your crafty goodness using Mr. Linky on the Dream it Up! blog or send a photo of your project to Lynell at lynell@dreamweaverstencils.com or, if after February 13, to Louise Healy at louisehealy@sbcglobal.net).  But before you head off to your craft space, check out the rest of the Dream Team blogs or more ideas and inspiration
Liz Martin (you're here)
 
See you next week,
Liz  


Thursday, January 31, 2013

A Fresh Start and a New Design Team

Yes, it's true.  The search for new team members is on.  Click on Dream Team Call 2013 at the top of Team Leader Pam Hornschu's blog for all the details. 

This post is another "fresh" stencil released at the Craft and Hobby Association trade show earlier this month.   And what's better than a little French flair on a luscious double-glittered cupcake!


Ingredients

LL552 Large Cupcake
LM2014 Bonne Fete
MPDS Double Sided Mounting Paper
Ultrafine glitter of your choice (I used Glitter Ritz)

Directions
For complete instructions and more samples of the double glitter technique, see any of my posts of June 2012.  When everything is glittered, mat your images on coordinating card stock.   For added interest and texture, dry emboss portions of the Fireworks (LJ886) stencil on the card base and card will really come to life!

Check out the rest of the Team blogs for more fun and inspiration and be sure to check the DREAM it UP! blog on Friday to see if you're a winner in this month's challenge and to find out what's in store for February.

Liz Martin (you're here)
See you next week,
Liz 


Thursday, January 24, 2013

The Fresh Start Theme Continues

There's more!  There's more!  Continuing with last week's Fresh Start theme and the new stencils released this month is this lovely LJ924 Bride, and it's very easy to do using the Molten Magic technique.

Begin by paste embossing the stencil with Pearlescent paste using the paste spreader (LM2010).  Remove the stencil and sprinkle Metallic F/X over the dress.  I find this easiest to do by dipping a Qtip or paint brush into the Metallic F/X and then tapping it over the pasted portion of the image where you want to add color.   Heat the colored portion with a heat tool until the paste begins to bubble.  The results will be different each time and that's the fun of it!  This one reminds me of the beading found on many wedding dresses.  I also added a bit of color to the veil and heated that, too, with the heat gun.  Set the stencil aside for the rest of the paste to dry. 

Reposition the clean stencil over the image and color to bouquet with ink using a small stencil brush and the Picasso tool.  I also added a touch of pink for the blush on the bride's face.   Here's another fun touch:  if you know the bride has a favorite color, or the colors chosen for the wedding, you can customize the card for her special day.

Now, there's still time to enter this month's Fresh Start challenge, so don't delay – you just might be a winner!   Check the Dreamweaver blog, DREAM it UP! for all the details and then stop by the rest of the Design Team blogs for more fun and crafty inspiration.
Liz Martin (you're here)
See you next week,
Liz  


Thursday, January 17, 2013

Several thoughts on a fresh start . . .

A fresh start can mean so many things and for me, one of the best ways to start the new year is to take in all the new products, ideas and inspiration at CHA, the Craft and Hobby Association's winter trade show.   We also celebrated the release of the new Dreamweaver Stencils – and a fun way to continue with this month's Fresh Start challenge theme!    

After the holidays, we all need thank you cards and here are two that are just perfect for conveying your warmest thanks with a bit of whimsy.
 The Bold Thank You stencil (LG748)  is perfect for the paper piecing technique.  Pick out your favorite coordinating papers and trace the letters, remembering to place your stencil face down on the wrong side of your patterned paper.  That is,  the side of the stencil with Lynell's name and stencil number should be placed against the back of your patterned paper so that when the letters are cut out, the tracing lines won't show and all your letters will be facing the right direction.  To make letter placement on the card front easier, I positioned the stencil on the card front and made faint pencil marks on the tops of each letter, so that I could recreate their position and spacing.  To give a little more definition, I outlined each letter with a Micron 03 pen from Sakura.

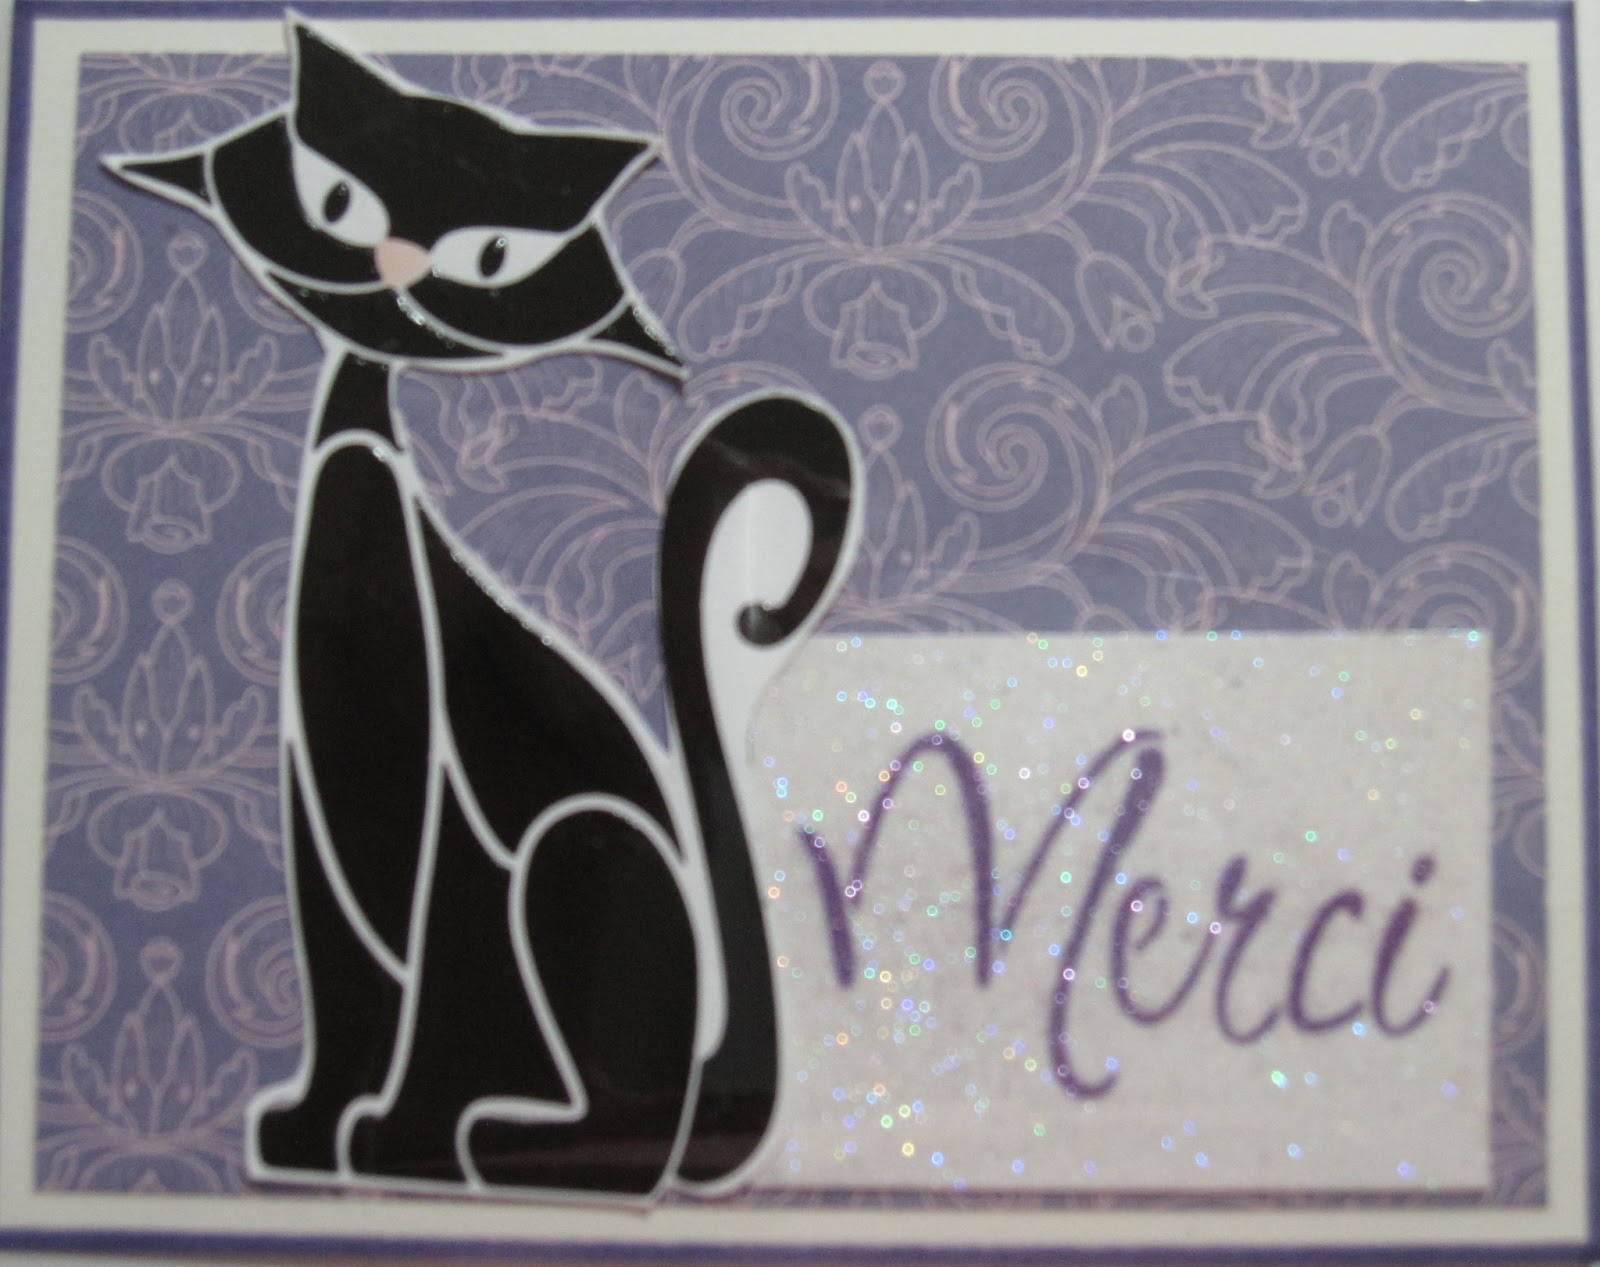
Those of you who saw this post know how much I love the Retro Sitting Cat (LL3020) and that I always have several (OK, more than several) images pasted up and ready to go.  So, when I got the Merci stencil (LS1011), I knew this would be a perfect match.

The cat is pasted with Glossy Black Embossing Paste (DGKP) and Merci is done with the double glitter technique  (you can find out more about that here).  Now, if you're very clever, you can glitter up the tiny beret from the (LG741) Kitty Words stencil and give this cool cat some real French flair!

That's it for today.  There will be more new releases and fresh starts throughout January.  For more ideas and inspiration, check out the rest of the team blogs and think a bit of your idea of a Fresh Start.  There are a lot of possibilities for interpretation, so let's see what you come up with.  There's plenty of time to post your project to Mr. Linky on the DREAM it UP! blog (where you will also find more information on the challenge) and you might just be a winner!


Liz Martin (you're here)


See you next week,
Liz  


Thursday, January 10, 2013

New Year . . . Fresh Start . . .

and New Beginnings.   Fresh Start, the January Dreamweaver challenge, can mean so many things:  challenging yourself to try something new, looking at a familiar object and seeing it/using it in a new way, embarking on an adventure, a new career, beginning another chapter in your life . . . and for some, the announcement of the arrival of a welcomed addition to the family is definitely a new beginning.


The stencil is LL327, Baby Shoes, with the words taped over, and Metallic Copper embossing paste.   Position the stencil on card stock and, with a palette knife or paste spreader, spread the copper paste over the stencil.  Set the stencil, knife or spreader in a pan of water and wash.  Or, why not paste several so you'll always have a pasted image ready when you need to make another card?   When the paste is dry, assemble the card(s) on coordinating papers and embellish to your heart's content!  It couldn't be easier


Why not start fresh and challenge yourself to an entry in Dreamweaver's monthly challenge.  You can get the details HERE.   And for more ideas and inspiration on what "fresh start" means to each of us, check out the rest of the team posts, beginning with Dreamweaver's blog, DREAM it UP!


Liz Martin (you're here)

Wishing a lot of crafty fun in this fresh new year!

Happy crafting,
Liz


Thursday, January 3, 2013

Happy New Year

Welcome to another year of stenciling fun!   It's a new year and a fresh start, which is also this month's challenge.  And a fresh start can mean so many things –  new beginnings, a clean slate, an unmarked calendar, new opportunities . . . the sky is the limit.   And what better way to begin our fresh start than by wishing our Stencil Queen Lynell a very big HAPPY BIRTHDAY!

One interpretation of a fresh start is taking an older stencil, Damask (LJ907), which I've used a lot with the double glitter technique, and given it a new look with Pearlescent embossing paste on light colored card stock.  This makes an elegant background for a variety of sentiments.  For this special birthday I chose Happy Birthday (LS1010), another stencil who has seen a lot of glitter.   I dry embossed it and then, with the stencil still in place, applied pigment ink with a stencil brush.    The pin, originally white, was colored with a Copic marker. 

Can't wait to get together at CHA next week to wish Lynell a very Happy Birthday in person, but until then, check out what the other design team members have made to celebrate this special day.  Start out at the Dreamweaver blog, Dream it Up! to get the details on this month's challenge and then visit the rest of the team.  We really do read and appreciate your comments.  A big thank you to all who have left us some love this past year.  We look forward to hearing more from you.

Liz Martin (you're here)

Wishing you a health, happiness and a lot of crafty fun in this fresh new year!

Happy crafting,
Liz