Welcome back to the final day of the Dreamweaver/Stampendous Blog Hop. All the Dreamweaver and Stampendous designers are participating today, so get ready to be inked, pasted, encrusted, stenciled and stamped! All of this week the Dreamweaver Stencils' Dream Team and the Stampendous Design Teams have been providing some "Dream-pendous" inspiration for you, with multiple opportunities to win some fabulous prizes from both companies. Each day this week, you will be directed from both the Stampendous Impressions' blog or the Dream It Up! blog to the players du jour for your oohing and aaahing pleasure. Everyone will be playing on Saturday, the 14th with our final hop for the week. This is your opportunity to see how to mix and mingle your creativity...if you are a stenciler, you will be fascinated at combining stamps with your first love. If you are a stamper, you will be wowed at how stencils can add to your impressions.

Begin by position the Rolling Hills (LJ910) stencil on your card stock and taping all sides. Here's where the fun begins . . . pace a few drops of Aspen Leaf Color Solutions Alcohol Ink on a splat mat or a piece of aluminum foil and add a drop or two of blending solution. Smush (newly coined technical term) your applicator tool into the mix and swipe, using smooth strokes, across the bottom of the stencil until you're satisfied with the way it looks. Change cotton squares and do the same with the Iceberg Color Solutions alcohol ink for the sky. Pick up the small drops of colors left on your mat or piece of foil with your applicator tool and use it to blend the space between earth and sky. Not one to leave well enough alone, I blended all the way to the top, making the sky a color that is not normally seen in nature, but one that does work for this card. Remove the stencil and clean it with rubbing alcohol while the card dries.
Stamp the Shade Tree** with Memento Tuxedo Black ink and color the tree trunk with Copic markers E31 and E33. Apply liquid glue lightly and randomly across the tree branches and sprinkle with Fresh Green Crushed Glass Glitter. Set aside to dry. Trim to size and adhere to coordinating card stock.
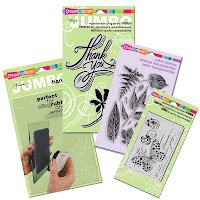
Be sure to leave comments as you tour the blogs (with your email addy!) for a chance to win* one of three combined sets of these Dreamweaver and Stampendous goodies:

There's a lot more to see, so be sure to check out the links below, but leave me some love before you "gear up" for the next player:
Happy crafting,
Liz
*For shipping and handling purposes, USA/APO/FPO/Canada winners only.
**This image will not be available for purchase online until April 21st. Please check your local store for immediate availability. 

