Thursday, January 17, 2013

Several thoughts on a fresh start . . .

A fresh start can mean so many things and for me, one of the best ways to start the new year is to take in all the new products, ideas and inspiration at CHA, the Craft and Hobby Association's winter trade show.   We also celebrated the release of the new Dreamweaver Stencils – and a fun way to continue with this month's Fresh Start challenge theme!    

After the holidays, we all need thank you cards and here are two that are just perfect for conveying your warmest thanks with a bit of whimsy.
 The Bold Thank You stencil (LG748)  is perfect for the paper piecing technique.  Pick out your favorite coordinating papers and trace the letters, remembering to place your stencil face down on the wrong side of your patterned paper.  That is,  the side of the stencil with Lynell's name and stencil number should be placed against the back of your patterned paper so that when the letters are cut out, the tracing lines won't show and all your letters will be facing the right direction.  To make letter placement on the card front easier, I positioned the stencil on the card front and made faint pencil marks on the tops of each letter, so that I could recreate their position and spacing.  To give a little more definition, I outlined each letter with a Micron 03 pen from Sakura.

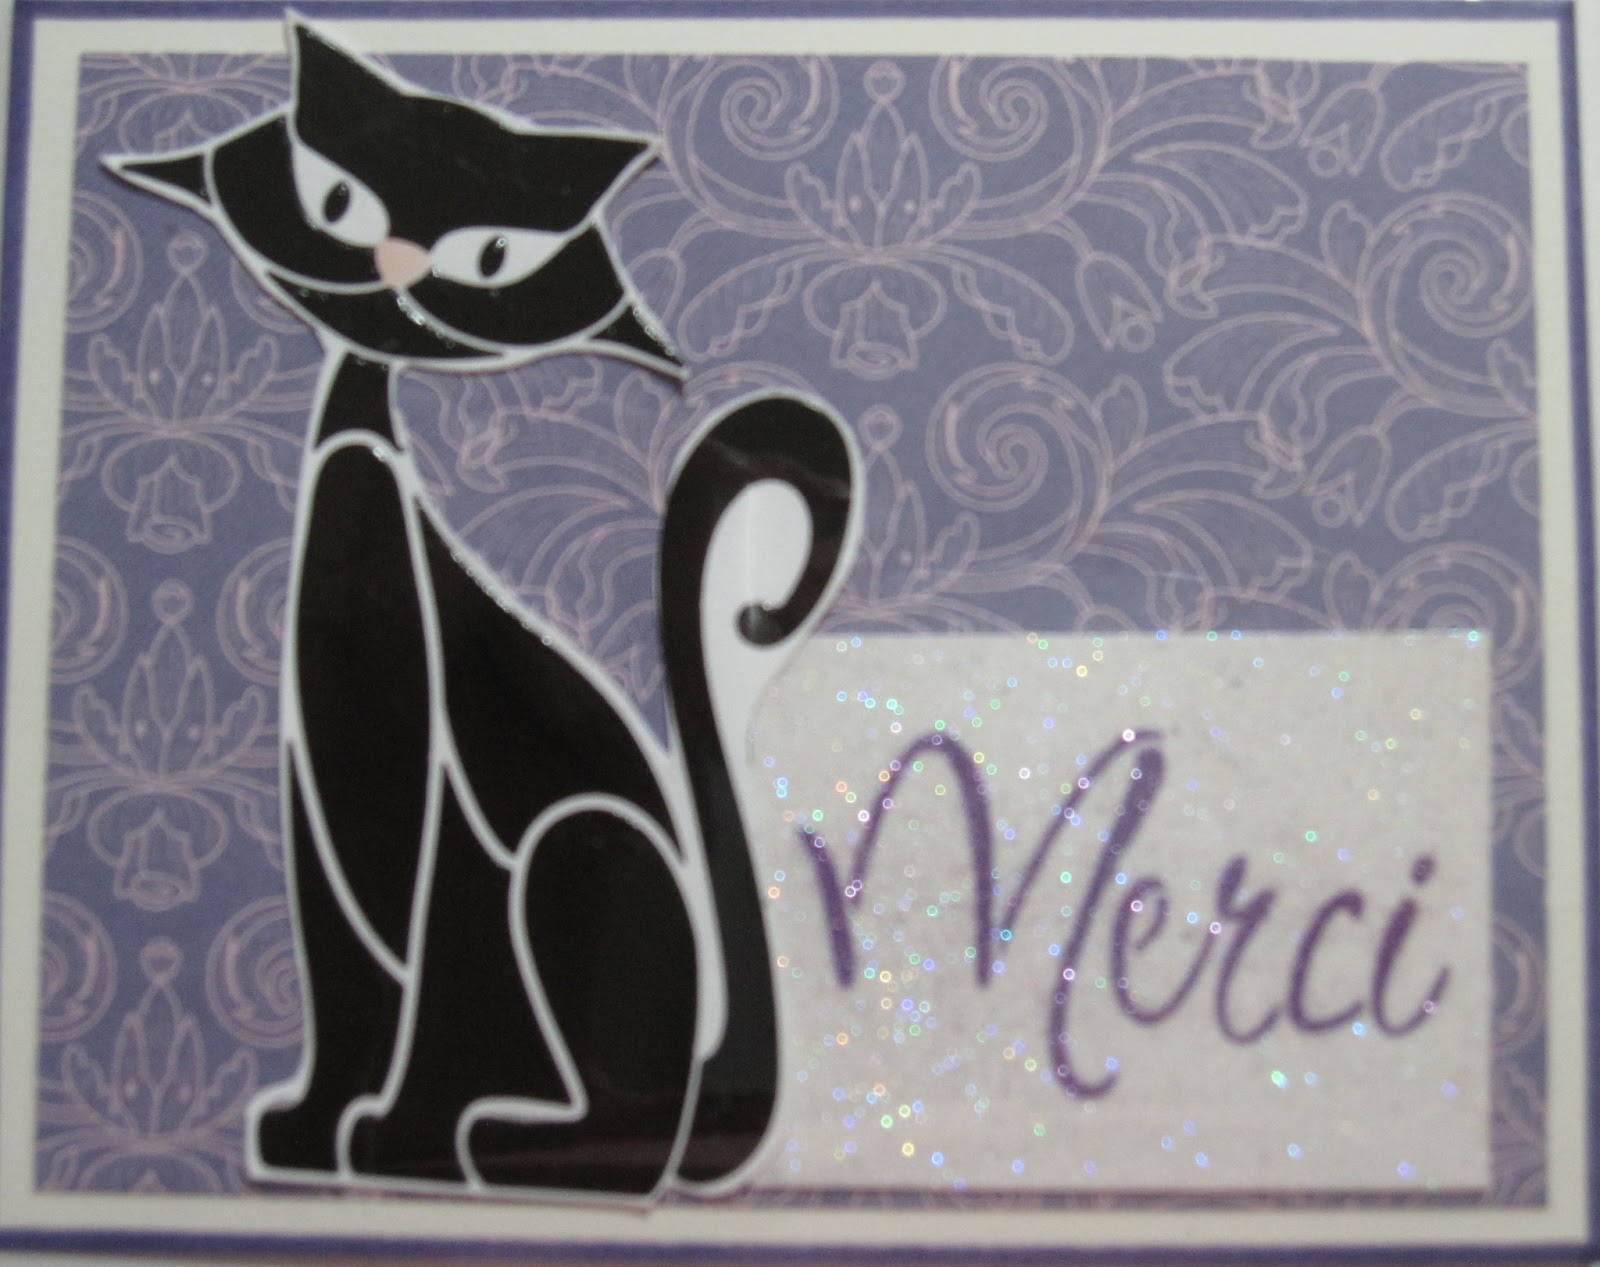
Those of you who saw this post know how much I love the Retro Sitting Cat (LL3020) and that I always have several (OK, more than several) images pasted up and ready to go.  So, when I got the Merci stencil (LS1011), I knew this would be a perfect match.

The cat is pasted with Glossy Black Embossing Paste (DGKP) and Merci is done with the double glitter technique  (you can find out more about that here).  Now, if you're very clever, you can glitter up the tiny beret from the (LG741) Kitty Words stencil and give this cool cat some real French flair!

That's it for today.  There will be more new releases and fresh starts throughout January.  For more ideas and inspiration, check out the rest of the team blogs and think a bit of your idea of a Fresh Start.  There are a lot of possibilities for interpretation, so let's see what you come up with.  There's plenty of time to post your project to Mr. Linky on the DREAM it UP! blog (where you will also find more information on the challenge) and you might just be a winner!


Liz Martin (you're here)


See you next week,
Liz  


Thursday, January 10, 2013

New Year . . . Fresh Start . . .

and New Beginnings.   Fresh Start, the January Dreamweaver challenge, can mean so many things:  challenging yourself to try something new, looking at a familiar object and seeing it/using it in a new way, embarking on an adventure, a new career, beginning another chapter in your life . . . and for some, the announcement of the arrival of a welcomed addition to the family is definitely a new beginning.


The stencil is LL327, Baby Shoes, with the words taped over, and Metallic Copper embossing paste.   Position the stencil on card stock and, with a palette knife or paste spreader, spread the copper paste over the stencil.  Set the stencil, knife or spreader in a pan of water and wash.  Or, why not paste several so you'll always have a pasted image ready when you need to make another card?   When the paste is dry, assemble the card(s) on coordinating papers and embellish to your heart's content!  It couldn't be easier


Why not start fresh and challenge yourself to an entry in Dreamweaver's monthly challenge.  You can get the details HERE.   And for more ideas and inspiration on what "fresh start" means to each of us, check out the rest of the team posts, beginning with Dreamweaver's blog, DREAM it UP!


Liz Martin (you're here)

Wishing a lot of crafty fun in this fresh new year!

Happy crafting,
Liz


Thursday, January 3, 2013

Happy New Year

Welcome to another year of stenciling fun!   It's a new year and a fresh start, which is also this month's challenge.  And a fresh start can mean so many things –  new beginnings, a clean slate, an unmarked calendar, new opportunities . . . the sky is the limit.   And what better way to begin our fresh start than by wishing our Stencil Queen Lynell a very big HAPPY BIRTHDAY!

One interpretation of a fresh start is taking an older stencil, Damask (LJ907), which I've used a lot with the double glitter technique, and given it a new look with Pearlescent embossing paste on light colored card stock.  This makes an elegant background for a variety of sentiments.  For this special birthday I chose Happy Birthday (LS1010), another stencil who has seen a lot of glitter.   I dry embossed it and then, with the stencil still in place, applied pigment ink with a stencil brush.    The pin, originally white, was colored with a Copic marker. 

Can't wait to get together at CHA next week to wish Lynell a very Happy Birthday in person, but until then, check out what the other design team members have made to celebrate this special day.  Start out at the Dreamweaver blog, Dream it Up! to get the details on this month's challenge and then visit the rest of the team.  We really do read and appreciate your comments.  A big thank you to all who have left us some love this past year.  We look forward to hearing more from you.

Liz Martin (you're here)

Wishing you a health, happiness and a lot of crafty fun in this fresh new year!

Happy crafting,
Liz


Thursday, December 27, 2012

Frosty Fun

We've had a lot of fun with this month's Frosty Fun challenge and I hope you've been able to play along.  There's still a few days left, so if you've got some time this week, join us!

This week's project from the archives is a salute to the annual New Years Eve fireworks display in San Francisco.  It's a crowded event – necessary in order to stay warm – and a lot of cool and frosty fun.  This card was super easy to make.  Begin by paste embossing the Fireworks (LJ886) stencil with Translucent embossing paste and a paste spreader (LM2010).   Wash the stencil and set aside to dry.  Sprinkle gold and silver glitter over the fireworks while the paste it still wet and set that aside to dry.  Stamp an image or sentiment of your choice and mat it with coordinating paper.  When the paste has dried, add ribbon or other embellishment and stamped image and you're done.  This makes a great invitation for a New Years Eve party or, with a different stamped image, a Happy New Year card if you didn't get all the Christmas cards out in time!

There's still a few days left, so I hope you'll find some time to play along.  You can get all the details about this month's challenge and the great prize package here.  And for more ideas and inspiration, check out the rest of the Dream Team blogs beginning with Dreamweaver Stencil's blog, Dream it Up!

Liz Martin (you're here)


Wishing you all a happy holiday season and warmest wishes for the new year.   See you next week.

Happy crafting,
Liz 


Thursday, December 20, 2012

Fun and Frosty outside . . .

 . . . warm and toasty inside, which is perfect for the season and a good reason to spend time in the craft room.   I like the idea of ice skating (does anyone remember The Skater's Waltz?) but am not very good at it (my one and only experience ended badly).   These lucky skates, however, are pure joy!
The background is the snowflake stencil (LJ819) paste embossed with translucent embossing paste.  After removing and washing the stencil, I sprinkled clear glitter over the paste while it was still wet.  After it was completely dry, I brushed off the excess glitter with a soft brush.

For the skates (LL3016), I dry embossed the metal first by running it through a personal die cutting machine and then, with the stencil still in place, went over the fine details with the small end of a stylus to give more definition.  Then, I turned the embossed metal over and applied regular embossing paste to the back to keep the details crisp and dent-free.  When dry, I cut it out and attached it to the snowflake panel. 

I know this is a very busy time of year, but there's still time to play along with this month's Fun and Frosty challenge.  You can find more information about it here.   For ideas and inspiration, be sure to check out the fabulous projects created by the Dream Team, beginning with the Dreamweaver Stencil blog, Dream it Up!

Liz Martin (you're here)


Wishing you all a happy holiday season and warmest wishes for the new year.   See you next week.

Happy crafting,
Liz 


Thursday, December 13, 2012

Fun and Frosty

We've got some very cold, near freezing temperatures headed our way the next few nights and, of course, you need warm wooly mittens to keep your hands warm.  Here they are . . .

I've had a lot of fun using the Mittens (LJ923) stencil and this time I paired it with Christmas Borders (LJ922) for the lovely pattern.  Here's what to do:

Place the Christmas Borders stencil on card stock and tape two corners to hold it in place.  Then, place the Mittens stencil on top and tape the two opposite corners.  With a foam applicator, apply Tim Holtz Distress Ink in Broken China in a pouncing motion over the borders stencil.   To give the mittens a bit more definition, I replaced the cleaned mitten stencil over the inked image and traced the outline with a Micron 05 pen.  Cut out the mittens, adhere them to matching card stock and hand cut a mat.  Adhere mittens to card base.   Attach ribbon and tuck ends into mitten cuff and you're done! Couldn't be easier.

I know this is a very busy time of year, but I hope you'll find some time to play along with this month's Fun and Frosty challenge.  You can find more information about it here.   For ideas and inspiration, be sure to check out the fabulous projects created by the Dream Team, beginning with the Dreamweaver Stencil blog, Dream it Up!
Liz Martin (you're here)

See you next week.

Happy crafting,
Liz 


Thursday, December 6, 2012

Frosty Fun

CONGRATULATIONS to November's  Holidays CAS Challenge winners

Yogi
for the best interpretation of the challenge
and
Sheila Lile
for best use of Dreamweaver products

 We look forward to seeing more of your work in the coming months.

 Now, on to December's challenge.  This month we are challenging you to design a wintery delight. It can be something other than paper, but again we will have two winners: "Best interpretation of the challenge" and "best usage of Dreamweaver products". This last month of the year we will award each of these winners a brand new stencil design we are releasing at CHA. (It's a secret until the very end of the month!)

The first thing that comes to mind is the song . . . "The weather outside is frightful," ta-da-da-da, ta-da-da-da, ta-da-da-da (humming along because I can't remember the words, but I do remember this part) "Let is snow, let it snow, let it snow."   Well, every time I've worked with this stencil, I just have to sing along. 
Here's what you'll need to make the card:
Clear glitter

The details:
Attach stencil to card stock and tape all sides with repositionable tape.  Apply metallic paste with paste spreader.  Remove, wash and dry the stencil; set image aside to dry.

Dry emboss ice skates on to aluminum using personal die cut machine, remembering to position stencil on the base plate and to use new cutting plates dedicated to dry embossing.  Remove stencil and carefully cut around image.

Adhere pasted image to card base and attach ice skates to card front with strong, double-sided tape.

We have a whole month ahead of fun and frosty inspiration, perfect for the winter months, when it's too cold to go outside.   Check out the rest of the design team blogs to see what they've been up to.  Then, sneak in some time to get crafty and post your project on the Dream it Up! blog using Mr. Linky.   There will be prizes for two lucky winners of this month's Frosty Fun challenge. 

Liz Martin (you're here)

Happy crafting,
Liz