Thursday, October 25, 2012

Dreamweaver/Ranger: Festively Distressed


Welcome back to week two of our amazing collaboration between Ranger's Tim Holtz line of Distress Powders, and our beautiful Dreamweaver Stencils and Products! If you missed last week's event, start HERE.

Last week, we were totally blown away by the awesome response we received from those of you who hopped over from Tim Holtz's blog and the Ranger blog to check us out! We've been doing the "happy dance" ever since! Hopefully, you will continue to check us out, especially over the next few weeks as we continue our play-time in Tim's sandbox. (It is rather an appropriate metaphor considering the cool texture of his Distress Powders.)

Apparently, Tim and the wonderful people at Ranger were also excited by the response, and they've decided to "up the ante" in the form of an additional prize package(s) which will include TWELVE Distress Powders each, and a handful of Dreamweaver Stencils to go with! Wow! Just one teeny-tiny detail...to win one of these packages from their blog, you need to create something with Tim Holtz's Distress Powders and Dreamweaver Stencils and attach it to the inlinkz on the Ranger blog. Winners will be selected randomly. For more details, head over to the Ranger blog.

Once again, this week we are offering another fall prize package as shown here. Just leave us all some love as you visit, for an opportunity to be the one random winner we select. Curious as to who won from last week? It could be YOU! Visit the Dream It Up! blog for the announcement of the lucky commenter.


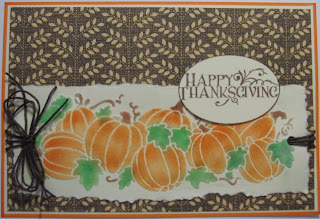
Here's what I created for this week:


Materials:
Dreamweaver Stencils Wrought Iron (LG684) and Long Pumpkins (LL514)
Dreamweaver Matte Black Embossing Paste (DMBP)
Dreamweaver Double-Sided Mounting Paper (MPDS)
Dreamweaver Handmade Coconut Soap (DHHS)
Inkssentials Emboss It embossing ink
Tim Holtz Distress Embossing Powders in Black Soot, Walnut Stain, Mustard Seed, Pine Needles,     and Shabby Shutters
Tim Holtz Distress Marker in Walnut Stain
Tim Holtz Distress Ink in Wild Honey
Tim Holtz Core'dinations Distress Collection paper in Walnut Stain and Spiced Marmalade
Tools:  Paste Spreader (LM2010), Palette Knife (WDPK), Inkssentials blending tool, sanding block,   and removable tape            

The Process:

Apply Wild Honey Distress Ink to card stock with applicator tool and foam pad.
Tape Wrought Iron stencil (LG684) to card stock with removable tape and apply matte black embossing paste with paste spreader.  Remove stencil and set pasted image aside to dry.  Wash and dry stencil and paste spreader.  
Reposition clean stencil over dry image and apply Embossing Ink to open areas of stencil with dauber.  Remove stencil and sprinkle Black Soot Distress Embossing Powder over image.  Heat with heat tool to set powder.  Applying embossing powder over the embossing paste gives more dimension and textue to the image.

Cut  2" by 2-1/2" pieces of card stock and double-sided mounting paper.  Remove one side of protective paper from the double-sided mounting paper and adhere to card stock.  Set aside until ready to use.

Rub Handmade Coconut Soap on the back of the Long Pumpkin stencil (you'll only be using the three pumpkins on the right-hand side of the stencil, so no need to coat the entire stencil with soap).   With a small brush, remove the soap "crumbs" from the stencil.  Peel off the protective paper and position your stencil over the sticky paper.  Apply Distress Embossing powders.  Separate the stencil from the paper by placing the stencil on a flat surface, paper side up.  While "walking" your fingers over the stencil, gentle peel back the sticky paper.  Cover the remaining sticky surface with embossing powder, tap off excess and heat with heat tool.   
Use the distress marker to give definition to the ridges in the pumpkins.
Trim, if necessary, and adhere to open area of wrought iron sign post.  

Cut mats to size and distress edges with sanding block.  Adhere to card stock.  Stamp sentiment above sign post, if desired, and adhere to card front.  Add buttons or other embellishments, if desired.


Aren't you excited to see what's next? Check out the Dream Team players for today:


You already know where to find Ranger's/Tim Holtz' products, but if you are having difficulty finding Dreamweaver, encourage your local stamp/paper-craft store to carry the line of fabulous stencil designs, pastes, and other products to mix with all of your stash of Tim's crafty goodness. You can also purchase our products on-line at Stencil with Style.

We'd love to see you come back regularly and play along with our monthly challenges (and more opportunities to win stencils) by linking your creations to mr. linky on the Dream It Up! blog, or emailing pics of your creations to lynell@dreamweaverstencils.com
. Since you're on the computer already, head on over and like us on Facebook as well. Just another location for dreamy and distressed inspiration!

See you next week,
Liz


Thursday, October 18, 2012

Dreamweaver and Ranger Collaboration


The Dream Team are so excited to have the opportunity to play along with some unique Ranger Products in the Tim Holtz line...specifically, the Distressed Embossing Powders! Our own Louise Healy demonstrated how fabulous these are with the Dreamweaver Stencils when she created this card for a fun class at CHA Summer 2012:


Apparently, Tim Holtz agreed with all of us on this unique use of his product, so he very generously had Ranger (thanks, Patti!) send the team some samples to play and blog with. So...here we go!

Here's my post for today:


Materials:
Ranger Distress Embossing Powders in Mustard Seed, Shabby Shutters, Peeled Paint, Vintage Photo and Faded Jeans
Tim Holtz idea-ology Kraft Glassine Sheets
Distress Ink in Faded Jeans and Antique Linen
Dreamweaver Stencil  Daisies LL548
Dreamweaver Double Sided Mounting Paper  MPDS
Handmade Coconut Soap DHHS

If you've been following along with our monthly challenges, you'll remember the double glitter projects from June.  This technique is much the same except that we're using Ranger's Distress Embossing Powders instead of glitter.  How great is that?  But, if you're new to our Thursday postings, here's what to do:


Adhere one side of the double-sided mounting paper (MPDS) to card stock, leaving the protective covering on the top side until you are ready to position your stencil.   Rub the back side of the stencil with Handmade Hawaiian Coconut Soap (DHHS), making sure to cover the entire stencil.  This will keep the stencil from making a tight bond with the adhesive.  Carefully brush the soap "crumbs" from the stencil openings, making sure not to bend the stencil.  Remove the protective paper from the double sided mounting paper and position your stencil, soap side down.

Using  a small scoop (a straw with one end cut at an angle works well for this), sprinkle the embossing powder on the open areas of the stencil.  Tap off the excess and repeat with the other colors.  When all the areas are filled in, place stencil, face down, on a flat surface and begin removing the card stock.  Be sure to keep the stencil flat against your work surface, moving or "walking" your fingers along the stencil as you peel back the card stock so that the stencil always remains flat and does not bend.  Apply your background color to the exposed areas and tap off the excess.  Heat the embossing powders with a heat tool.  

Begin layering your background papers on to your card stock.  I began by applying Antique Linen Distress Ink to the edges of the card stock with a finger dauber.  Then, I crumbled a piece of white paper, flattened it out and pounced the Faded Jeans ink pad in random fashion until all the raised areas were covered.  The next layer was a piece of Tim Holtz idea-ology Kraft Glassine paper with the edges torn.  The last layer was the embossed daisies with a pleated ribbon trim.

For the next four weeks, on our regular Thursday posts, we will be featuring the wonderful things that you can do with Tim's Distress Powders and Dreamweaver Stencils.  Leave comments on each of the team blog posts for opportunities to win one prize package for each of the four weeks.

The prize:


The blogs:

In addition, don't forget to play along with the Dream Team's monthly challenges for more opportunities to win some great stencil designs!  October's challenge is Festively Fall, and November is CAS (clean and simple) Christmas! Link your creations on the Dream It Up! blog, or email pics to   lynell@dreamweaverstencils.com.   Join us on Facebook as well! Lots of inspiration, and lots of fun!

Happy crafting,
Liz

Thursday, October 11, 2012

Fall is in the air . . .

. . . and leaves are falling faster than we can get them to the compost pile.   Summer's flowers are making room for the more intensely colored sunflowers and dahlias, and I immediately thought of the Stylized Dahlia (LG743) for today's card.

And it couldn't be easier to do.  Rub in Ranger's Distress Ink in Wild Honey around the edge of the card stock, the  paste emboss the stencil using matte black embossing paste.  When that has dried, reposition the clean stencil over the image and apply Palette Stamp and Stick Glue  with a dauber.  Using the colors of your choice, apply Metallic F/X with a fine paint brush.  Mat on coordinating card stock, add the embellishment of your choice and there you have it!  This is a great card for making multiples, too.

There's still time to submit your project for October's Festively Fall challenge, using Mr. Linky on the Dream it Up blog or if you don't have a way of linking, email your design to Lynell  (lynell@dreamweaverstencils.com)  and she will link it for you.  The two lucky winners (one for the best interpretation of the challenge; the other for the best use of Dreamweaver products) will get to pick their own stencil.

For more ideas and inspiration, check out the rest of the Dream Team blogs, but not before leaving me a note letting me know you stopped by.


Happy crafting,

Liz


Wednesday, October 3, 2012

October's Festively Fall Challenge

It's October and fall is in the air, pop-up pumpkin patches are appearing everywhere, and fall-themed festivals are taking place on most weekends.

Dreamweaver has lots of stencils and materials that can be used for a Fall theme, but remember you can post any Festively Fall creation and win best interpretation of the challenge – it can be any product or image.  Again we are letting our winner choose any stencil they desire.   So one winner will be chosen for best usage of Dreamweaver products and one winner will be chosen for best interpretation of the challenge.  Just link up with mr linky on the Dreamweaver blog or if you don't have a way of linking, email your design to Lynell  (lynell@dreamweaverstencils.com)  and she will link it for you.

Speaking of pumpkins, here are two more cards from the archives made with the Long Pumpkins (LL514) stencil (can you tell how much I like it???).

 For this card I paste embossed the entire stencil with regular embossing paste (DEP) and, when dry,  colored the image with pigment inks.


 For the spider web card, the three pumpkins on the right hand side of the stencil were dry-embossed and then colored with pigment inks.  For the background, I paste-embossed the Spider Web (LJ816) stencil with glossy black paste (DGKP).

For more ideas and inspiration, check out the rest of the Dream Team blogs      


Happy Crafting,
Liz